
Treatment of a Deruta Maiolica dish, Part III
By Jane Townsend
Editor's note: This continues on from Part II here.
It was important to complete the bonding of the 11 pieces in one session so I planned a day where I could give the bonding my full attention and could be supported by my classmates and tutors when I needed more than one pair of hands.
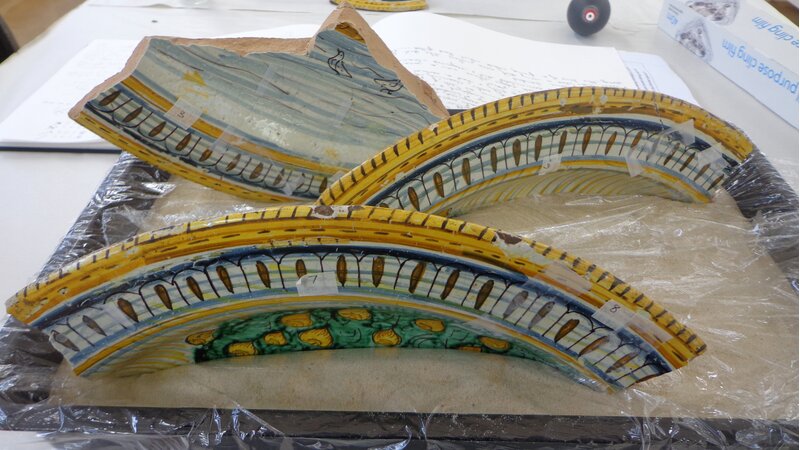
Due to the object's weight and size I needed to use a sand tray (see Figure 13 for picture of the tray in use) to support the bonded sections whilst the adhesive cured. I used the edge-to-edge technique of applying the adhesive along the break edge with a cocktail stick before, holding the join tightly with Magic tape, and nestled the sections into the sand tray with cling film to act as a barrier to the sand.

The more pieces that were assembled, the more difficult it became to handle them and tighten the tapes. Penny Caldwell, Associate Tutor in ceramics, was always there to lend a hand.
Once all the main sections were in place the dish was left assembled in a supported position on the workbench whilst the Paraloid B-72 fully cured. It was a tense moment when I sound tested the dish for the strength of the bonds and removed the tapes. My relief was immense and felt a cup of West Dean coffee was required in order to celebrate as all had gone well!
I felt a significant part of the conservation treatment had been achieved and it was important not to loose concentration now or rush to finish.
After removing any excess adhesive the next stage was to place all the small shards on both the front and reverse of the dish. Due to their size and close proximity to each other I decided to tape them in place using tiny numbered tapes so I could identify them all after placement, which was not always easy.

I decided to bond these also with Paraloid B-72 but this time it was not edge to edge but by using capillary action, where the adhesive is introduced along the bond line (it is then sucked into the join by capillary action) and was chosen to avoid disturbing the small fragments when inserting subsequent shards. The Paraloid B-72 was extended using acetone and a small drop of IMS. This slowed the curing time of the adhesive and gave it more time to travel along the bond lines.
With everything in place it was time to undertake the world of colour filling, which I was both looking forward to and dreading, due to a less-than-successful first attempt at previous test object.
The areas of loss to be filled were coated with a 10-20% w/v solution of Paraloid B-72 to ensure that when adding the colour fills it would be reversible at some point in the future. I felt the reverse side was more straightforward and so began with this. I decided to use Araldite® 20/20, an epoxy resin, and mixed it with Cab-O-Sil® fumed silica for bulking; I spatulated the mixture until a smooth glossy appearance was achieved. Then dry power pigments were added to match the general colour on the reverse. I filled all the areas of loss including the rivet holes, and the areas of loss around the initial firing crack were modelled to follow the appearance of the crack itself.

These were later smoothed and polished using Micromesh® abrasive cloth in different grades, and then finished with a silk cloth.
The areas of loss on the foot rim were filled using Flugger® (as a secondary plaster-based fill). These areas were very small and had to be applied with a toothpick and smoothed with a damp brush. There was some minor retouching on the reverse which I did using Akademie Acrylic® colours with water and applied with a fine brush.
My attention then turned to the front of the dish and by this time I felt more confident.
I chose to do most of the fills in the pale off-white background colour and the green of the tree. This worked well using the same approach as the reverse with the bulked Araldite 20/20 and dry powder pigment. I was very careful during this process not to fill any "old" areas of loss such as chips with ingrained dirt on the rim as they formed part of the object's history which does not affect the stability of the object.
The same finishing process was taken for the colour fills on the front and retouched where needed.


The object's treatment was a lengthy process but the object itself has become one to which I have come to be very attached. I feel that during the treatment stages I have come to know a little more about the original potter and artist who made it. I felt this particularly in spotting a fingerprint, either of the potter or person decorating the dish, in the glaze on the rim on the front. The quality and complexities of objects made so many years ago-with none of the technical wizardry we now possess-never ceases to amaze me.
Thank you for following my story and hope you enjoyed the journey.


